One of the first food memories I have is of stuffing my 2-year-old face with fistfuls of delicious Barbecue Pork Buns (Char Siu Bao), baked to golden perfection and containing the ideal balance of savory and sweet, while my grandfather chatted with the other old timers over a cup of coffee and the daily Chinese newspaper in our favorite hole-in-the-wall in Chinatown.
Char Siu Bao is a classic Cantonese dim sum dish that I have never dreamed of recreating on my own. Partly because it always seemed too daunting and labor-intensive (true dim sum chefs spend years perfecting their craft), and partly because they are so darn cheap ($1 or less in Chinatown), why not just leave it to the pros?
Well, since Project Food Blog has challenged me to tackle a classic dish, I figured this would be a good a time as any to try my hand at recreating this ultimate dim sum morsel.
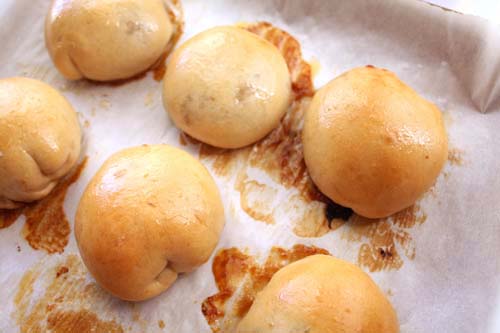
Baked Cha Siu Bao
If you’re not familiar with this dish, they are buns that are stuffed with a saucy filling of barbecue pork (char siu), onions, and other highly addictive, umami-rich ingredients. The bun can be steamed fluffy and white, or baked to a light golden glaze with a touch of honey. When executed correctly, the Char Siu Bao is a veritable poetic exercise in complementary flavors and textures. When executed by a dim sum amateur…a little MacGyver-ing may be required in the end…
But let’s start from the beginning!
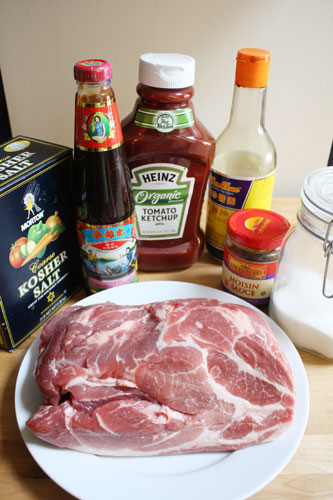
Ingredients for Cha Siu
I started out by making the char siu. I took a big hunk of pork shoulder and cut it into strips. Pork shoulder is a relatively inexpensive cut of meat that won’t dry out like other pieces because of all the marbling it has. It’s commonly used in slow-cooked recipes like pulled pork.
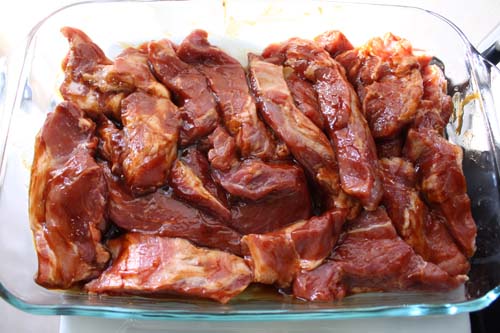
Chinese Barbecue Pork (Cha Siu) Marinating
I zhudged (that’s a technical term for “massaged with love”) the meat in a mixture of ketchup, hoisin sauce, soy sauce, sugar and salt, and let it sit overnight. Then, roasted it off until the fatty parts got a nice golden caramelized crust.
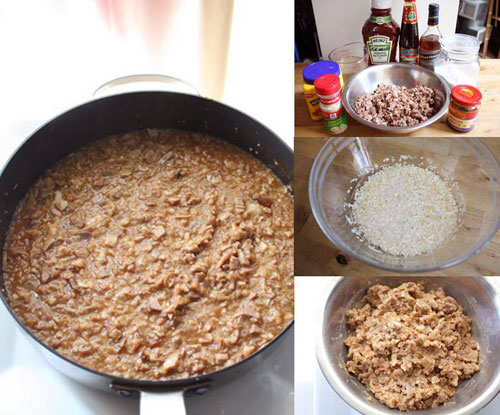
Barbecue Pork Filling
Now, to turn the barbecued pork into my filling, I diced it up finely and combined it with onion flakes and some saucy goodness. More ketchup and hoisin, plus chicken stock, oyster sauce, and a touch of sherry. The mixture seemed like it had a lot of liquid, but my recipe assured me that this was correct, and would result in juicy buns. Mmm, juicy buns…
The filling did firm up a bit as it chilled and as the onion flakes rehydrated. My measure of the perfect char siu bao from my childhood spot uses caramelized fresh onion rather than dehydrated onion flakes, which this recipe called for, so I’d be curious to try that next time.
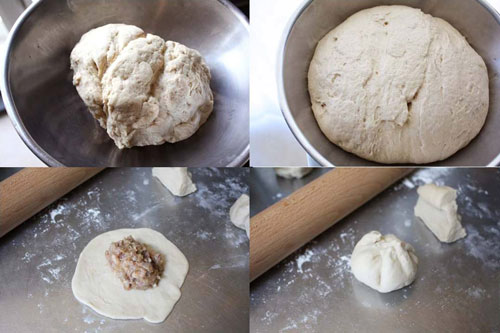
Rolling and Forming the Buns
Ok, filling, check. On to the tricky part – the dough. I was surprised to see that the recipe for steamed dough and baked dough were the same. Works for me, that way I could try both preparations. I mixed up the dough and let it rise as directed. I was worried that it seemed a little too tough and elastic…this did not bode well if I was going for fluffy buns here. But too late to turn back now!
Onward.
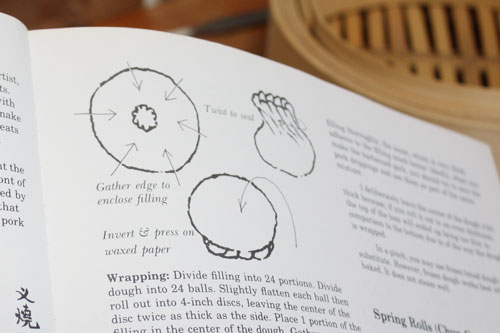
Bao-Making Diagrams
Rolling the buns out and folding them were a bit tricky. I tried to leave the center of the disc thicker than the edges, like the recipe said. The reasoning for this is so that the thickness of the top matches the thickness of the bottom part, which will have more bulk because of the way it is gathered up when it’s sealed.
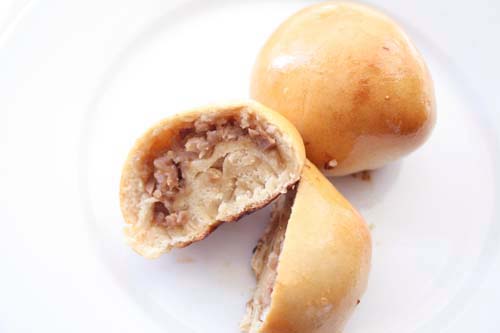
Baked Cha Siu Bao
The final verdict?
My steamed buns puffed up nicely, but then quickly deflated when I removed them from the steamer. Also, I found that unless I ate them right away, the dough quickly became too hard and chewy.
My baked buns looked beautiful. I added a bit of honey to the melted butter I brushed on top to give it some extra sheen and sweetness. When I cut them open though, I saw that the bottom part, where I twisted and tucked the dough under, was way too thick. It took up all the room where more delicious filling could have been. And the dough was too hard. Not soft and sweet like it should have been – like brioche, almost.
The char siu filling though, was tasty. Ok, half the battle was won. I guess I won’t beat myself up – it was my first try after all, right?
Still, my defeat nagged at me. I did have some filling left over…
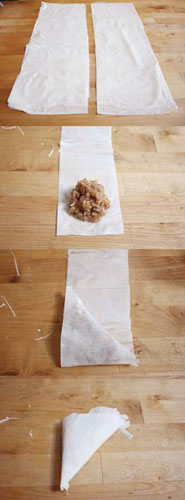 I put on my MacGyver face and got a bolt of inspiration. Another one of my favorite dim sum dishes is a riff off of the Char Siu Bao. It’s called Char Siu So – essentially, the same filling as the bao, but instead of being enclosed in a bread dough, it is wrapped in a buttery, flakey, pastry dough that is almost like biscuit, but flakier. It is usually wrapped into a triangle shape. Triangle pastries and flakiness got me thinking of phyllo dough.
Store-bought phyllo to the rescue. Easy and quick, I put my experiment to the test. I cut one sheet of phyllo in half, lengthwise, and folded it over so that I had one long strip. Then, spooned some filling on the bottom, and proceeded to wrap it up into a triangle.
I deep fried it, sprinkled some sesame seeds on top, and ta-da! Redemption! I suspect you could also brush the phyllo with melted butter and bake them, but frying will definitely give you the golden crisp you want here.
So, although my first go at making Char Siu Bao wasn’t exactly a resounding success, but it did inspire me to come up with this take on Char Siu So, which I will definitely keep in my repertoire for party hors d’oeuvres. For this, I owe Project Food Blog a big Thank You. Thanks for pushing me out of my comfort zone 🙂
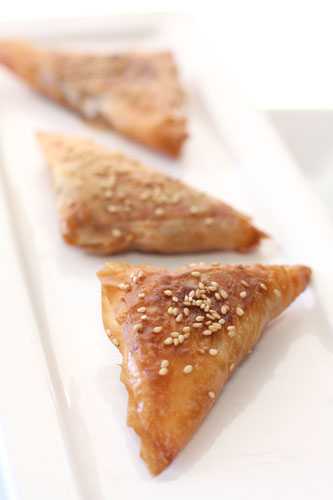
Char Siu So
Thanks, everyone for all the support through PFB Challenge #1! Because of you, we’ve advanced to the 2nd round.
(Voting for Round #2 is Open Mon 9/27, 6 AM PST – Thurs 9/30, 6 PM PST)
Ingredients
- 3-3 ½ lb boneless pork butt (or pork shoulder)
- 4 tablespoons sugar
- 4 tablespoons ketchup
- 2 tablespoons hoisin sauce
- 1 tablespoon dark soy sauce
- 1 teaspoon salt
- ½ cup dehydrated onion flakes (or 1 cup diced onion, caramelized)
- 1 ½ cup chicken stock
- 1 ½ tablespoon cornstarch
- 2 tablespoons oyster sauce
- 1 tablespoon hoisin sauce
- 1 tablespoon ketchup
- 2 teaspoons sherry
- 1 teaspoon sugar
- 4 cups finely diced barbecued pork
- 1 package phyllo dough, defrosted
- 4 cups vegetable oil, for frying
- Sesame seeds to garnish
Instructions
- Cut pork butt into 4 inch by 2 inch by 1 inch strips. Using a fork, puncture the meat a few times. Mix rest of ingredients and rub over pork pieces. Marinate at least 4 hours, or for 1-2 days.
- Preheat oven to 375 F. Line roasting pan with foil and place pork on top. Roast for 45 minutes or until you get some golden crusting on the fatty parts of the meat. Turn the pieces over once halfway through cooking time.
- Soak onion flakes in a cup with just enough water to cover flakes. (If using fresh onion, just caramelize and set aside.)
- Mix together the remaining sauce ingredients in a small sauce pan. Cook over medium high heat until sauce thickens. Stir in the diced pork and onion. Chill 3-4 hours.
- Cut your phyllo sheet in half lengthwise. Take each half and fold over lengthwise, so that you have one long strip.
- Place 1 teaspoon of filling on the bottom corner of the strip. Fold up corner to form a triangle. Continue folding in triangles until the entire length of dough is folded. Seal end with a dab of oil. Repeat procedure with rest of the phyllo.
- Heat oil in wok over medium high heat. Deep fry triangles until just golden. Keep an eye on them, they will cook up quickly.
- Drain on paper towels. Sprinkle sesame seeds on top. Serve immediately.
Notes
Make Ahead: Barbecued pork can be made anywhere from a few days to 2 weeks in advance. Just wrap and freeze. For cold appetizers, thaw, then slice just before serving. To reheat, thaw first and reheat in a slow oven until just heated through (about 20 minutes).
Recipe Source: LickMySpoon.com.
Hello! All images and content are copyright protected. Please do not use our images without prior permission. If you want to republish this recipe, please re-write the recipe in your own words, or simply link back to this post for the recipe. Thank you!
This recipe is brought to you by LICK MY SPOON
http://lickmyspoon.com/events/project-food-blog-challenge-2-the-classics/