Meringue Topped Cookie Barsfeatured
We’re heading into prime BBQ season and I can’t wait to blend up some frosty drinks, fire up the grill, and enjoy the feel of fresh cut grass under my toesies. While Banana Boats are still my go-to summer party trick, I’ve recently discovered a cookie bar recipe that I suspect will be making quite a few appearances in various forms this season.
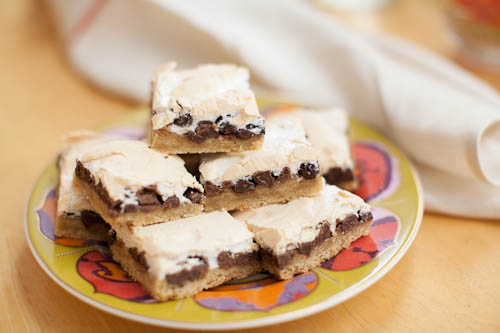
I spied these Halfway Cookies on The Kitchn and I just knew I’d love them. They start with a cookie base strewn with chocolate chips, and end with a crackly meringue topping.
What is it about meringue that is so magical?
It instantly turns a dessert into something light, elegant, special. The texture is marvelous. A dry, airy crumble that gives way to soft chew. And pretty incredible that all it takes is egg whites, sugar, and a trusty mixer. When making these bars, whipping the egg whites to a soft peak will result in more of a marshmallow-y topping, while bringing the whites to a firm peak will give you a crunchier texture.
I also love how versatile this recipe is. Layer in nuts, caramel, coconut flakes. Make it in a pie or tart form. Get fruity and use some homemade jam or marmalade. I can’t wait to try a version of this with strawberry jam! Dreamy.
These Meringue Topped Cookie Bars travel well and will be a sure hit wherever you take them.
These dessert bars are the perfect sweet treat to bring to a BBQ, picnic, party, or bakesale. Familiar chocolate chip cookie bottom, topped with a fun meringue topping that adds a delicate crunch and marshmallow-y chew. (Adapted from The Kitchn's Halfway Cookies).
Ingredients
- 2 cups flour
- 1 teaspoon salt
- 1/4 teaspoon baking soda
- 1 teaspoon baking powder
- 1/2 cup unsalted butter, softened
- 1/2 cup granulated sugar
- 1 cup brown sugar, separated in half
- 2 eggs, separated
- 1 tablespoon water
- 1 teaspoon vanilla
- 12 ounces dark chocolate chips or chunks
Instructions
- Preheat the oven to 350°. Line a 9x13 baking dish with two pieces of foil, one pressed lengthwise and the other pressed crosswise with the ends hanging over the sides of the pan. This makes it easy to lift the bars out of the pan once they\'re cooled. Spray the foil with nonstick spray.
- Make the Cookie Dough: Whisk together the flour, salt, baking soda, and baking powder in a small bowl and set aside. Using a mixer, cream together the butter, the granulated sugar, and 1/2 cup brown sugar until smooth.
- Separate the eggs, reserving the whites. Mix the yolks into the butter-sugar mixture one at a time until they are completely absorbed, then mix in the water and vanilla. With the mixer at a low speed, add the flour mixture and beat gently until all the flour has been absorbed and the dough looks crumbly.
- Press the cookie dough into the pan with your hands, making sure the surface is even.
- Sprinkle the chocolate chips on top of the cookie dough and use your palms to press them slightly into the dough. This will help keep them from moving when you add the meringue.
- Make the Meringue: Using a stand or hand mixer with a clean bowl and a clean whisk attachment, start whisking the egg whites. Gradually increase your speed to medium-high. When the egg whites are very frothy, start adding the remaining 1/2 cup of brown sugar a little at a time. Continue increasing your speed to the highest setting. When all the sugar has been added, continue whipping the meringue until it holds a firm peak. When you turn your whisk upside down, the peaks should hold but the tips will fold back on themselves.
- Scoop the meringue down the middle of the pan. It will be very sticky! Use a spatula to gently spread the meringue from the middle to the edges, gradually skimming the top and pushing it outward.
- Lightly press a piece of well-greased parchment or wax paper on top of the meringue (this makes an even layer and protects the meringue from scorching). Bake for 20 minutes, then remove the parchment. Continue baking for an additional 8-10 minutes, until the edges look toasted.
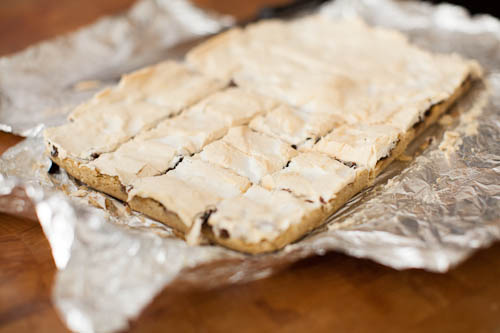
- Wait until the pan is completely cool before lifting out the bars and cutting them into pieces.
Recipe Source: LickMySpoon.com.
Hello! All images and content are copyright protected. Please do not use our images without prior permission. If you want to republish this recipe, please re-write the recipe in your own words, or simply link back to this post for the recipe. Thank you!





Add comment